
When you’re creating your first online course, there’s a lot to get excited about. Between planning and creating beautiful slide templates and writing scripts for your live promotional webinars, it’s easy to get ahead of yourself.
Before you can sell a course, though, you need to have a course. Or at least an idea of what your course is going to cover, should you choose to presell.
With that said, you need to plan your course content. This can seem like an intimidating task for those of us who don’t have teaching degrees and have never lesson planned in our lives, but I’m here to ease your worries and assure you that it’s easier than you might imagine.
You’re qualified even if you’re not “an expert”
Some people get hung up in the planning stage. I think every online course instructor has had that moment of panic that says, “Who am I to be teaching this? I’ve only just learned it myself and I’ve never taught anyone anything! I’m not even an expert!”
Deep breaths, my friend. You don’t have to be an expert and you don’t have to have experience teaching. What you do need is to be an authority and at least one step ahead of your audience.
The more recently you were in your students’ shoes, the better you remember their pain points, and more importantly how you overcame those pain points.
It’s easy to get that feeling of “Oh no! I’m an imposter!” but push those voices to the back of your head and keeping pushing forward.
Now, moving forward:
Narrowing down a course topic
For the purpose of this post, we’re going to imagine that you already have a pretty solid idea of what you’re going to teach, but before we go any further, let’s refine it.
Oftentimes we see our course instructors trying to be everything for everybody, and that is something you want to avoid. It’s tempting to want to create the biggest, flashiest, most comprehensive course on your chosen topic ever, but we’ve found that’s not actually what most students want.
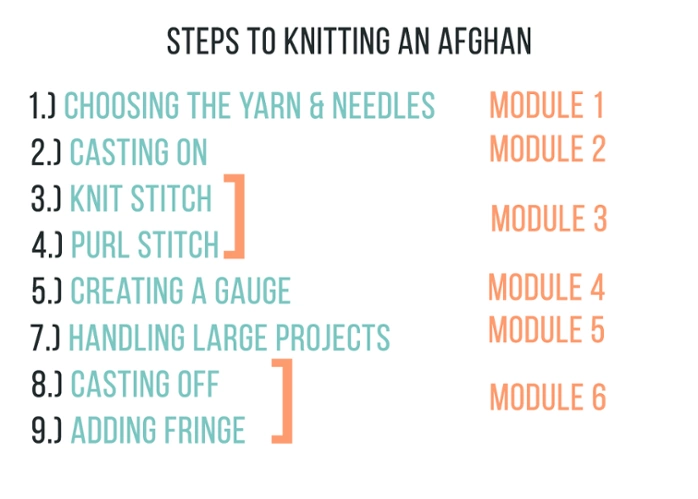
Most students have a very specific pain point they want solved. They don’t need to know knitting 101, they don’t have any interest in knitting anything other than afghans, so while your modules on mittens, and scarves, and ponchos may all be great and informative, your audience won’t care to watch them.
Instead, solve their specific pain point. Reach out to your audience directly and see what it is they’re struggling with and would like to know and go from there. You can post a tweet asking your audience what they’re struggling with, or send a survey out to your email list.
Wherever your audience is hanging out, meet them there and find out their problems.
{{freeplan-component="/blog-shortcodes/call-to-action"}}

Planning your course content creates a solid foundation for your entire course business, and here is the fool–proof guide walking you through how to do it.
You’ll likely find the same pain point will come up again and again. Focus there.
If you’re bent on creating the ultimate resource on your topic ever, consider creating a course bundle in the future. That means you can combine 5 different courses about knitting and combine them into an ultimate bundle. This gives your audience the freedom to choose what they want to learn based on what they already know.
Settled on a course topic?
Great! Once you know what you’re teaching, we can get into the nitty gritty and actually plan your course content.
This might seem intimidating or overwhelming, but trust me when I say that you’re more than equipped to get started.
Deciding who your course is for
When you’re planning your course, you need to decide what level your audience is already at. If they already know the basics of your topic and you’re going to help them advance in their skills or apply them in a new way, you don’t need to spell out the very beginning steps.
On the other hand, if they’re completely new to what you’re teaching you’re going to have to put yourself back into their shoes and think about your struggles when you were just getting started.
Again, this is a good time to look towards your current audience. Do they already know how to knit and want to apply those skills to making afghans? Or are they complete novices with big afghan dreams? This is something you can also clarify when you’re asking them about their pain points.
Once you choose your audience, we’re ready to start planning.
Creating your course structure
The first thing you’ll need to do is determine your transformation. What exactly will your course teach your students how to do? Be specific here. “Be healthier” isn’t clear enough. Instead, the transformation could be, “Transform their health by teaching them how to eat a real food, plant-based diet and cook their own meals at home.”
From there, you can breakdown the transformation into “milestones” or sections. The secret is to aim for between 5 and 10. Here are my example milestones:
- Why a plant based diet?
- The fundamentals
- The protein problem: Where do plant based proteins come from?
- The ten pantry staples you should have in your vegan cupboard
- Calorie density and why it matters
- 10 minute breakfasts
- 15 minute lunches and dinners
- Meal prepping
From there, you can break down each milestone into individual steps or lessons. For example, I’d break down my “10 minute breakfast” milestone into these lessons:
- Overnight oats
- Tofu scramble
- Breakfast smoothie four ways
- Acai bowls
- Breakfast wraps
You want each lesson to be short and munchable. The videos should be no longer than fifteen minutes, but ideally they’d be ten and under.
The reason for that is you want your audience to be able to go back to your course and easily find a specific point you made without having to rewatch a 40 minute video. If you find yourself asking, “should I break this video into two?” the answer is more than likely going to be yes.
Choosing content types
Video
Here you can speak directly to your customers. Sitting down on video is a great way to really make that connection with your audience and get your points across. Video is a great content choice, but there are times when Text & photo might be better, like when there is too much information to recite on video.
You can get started creating video content for free, too. All you need is your cell phone or webcam to record, and a free program like iMovie or Windows Movie Maker to edit. For more on recording DIY video, check out this post.
Slides
If you’re looking to focus your video and make your lessons easier to follow, you can add slides to your recordings. For this type of video, you can create a presentations and record a voiceover in Google Slides or PowerPoint through your slide content.
Audio
If you’re a fan of podcasts, you know how strong stand alone audio can be. While we do recommend using visual cues for most topics, there are times when audio alone can be effective.
For example, if you’re discussing a personal anecdote related to your course topic, we’d recommend using an audio or video format.
Text and photo lessons
These are made up a lot like this blog post. Utilizing written word and photos to get a point across. These are the easiest lessons to create and they take no advance skill. Plus, they can be built entirely on Teachable.
Text and photo lessons are great for visual learning or material that might be too in-depth to recite on video.
PDFs, spreadsheets, and other documents
If your course has a workbook, a cheat sheet, or resource material that you want students to easily reference, you may want to make it available for download in PDF form. Offering these extra materials can really help your students feel like they’re getting a great value.
If you want to create free downloadables for your online course, check out this blog post with free templates.
Bonus content
Now, you likely have ideas for content types that don’t fall directly into any of these categories. That’s totally fine!
Oftentimes, course creators offer “bonus content” to make their course more exciting or high value.

Screencasting, or screen recording: With screencasts, you can demonstrate a topic on your computer and record the screen.Often, when screencasting, you’ll also include an audio voiceover, which you can record at the same time or after you have the video recorded. These simple videos are a great way for you to directly teach your students without being on camera yourself.
Putting it all together
When you’re planning your content types, remember that you don’t have to do it all. We see so many incredible and high value courses utilizing just one or two course content types. Here are a few suggestions we have depending on the size of your course.
Best combination for mini courses
When you’re creating your mini course, keep in mind that this is a lower tier offer that you won’t be able to charge hundreds of dollars for, so don’t worry too much about creating every single type of content for your mini course.
We find that a combination of text and picture posts and video are powerful for mini courses.
Mini courses are short by nature and should target just one or two of the milestones we mentioned earlier. Use whichever content types best help you explain, but don’t go overwhelm.
Best combination for intermediate courses
Intermediate courses are a bit more advanced and thorough, covering a more expansive topic. With that in mind, you can charge from $100-$500 for your intermediate course.
Knowing that you’ll be earning more from your intermediate course, you can spend more time creating more advanced content types. For example, every milestone might include two in-depth slide videos with voiceovers. They’re time consuming to create, but they’re valuable and therefore worth the time invested.
Best combination for advanced courses
Advanced courses are the creme de la creme of your online course business. These are your most expansive, high-value products and you’re charging $500+ for them. That premium price point calls for premium content.
You can still keep it simple, using a mix of videos, slides, and text; or you can add different content types such as bonus downloads or voice recordings.
Put it to the test
Before you go all in and commit to recording everything, consider asking a friend you trust (who doesn’t have experience with what you’re teaching) to take a critical look at your outline. Ask them what questions they might have or what gaps need filled.
I’ve said it before—but you may very likely gloss over the things that are just so simple and so obvious to you after gaining experience that you often need a fresh pair of eyes to let you know what is missing.
The most important question you need to ask your friend: Would you feel comfortable executing what my course is teaching after reading this?
If the answer is no, ask them why and work with them to fill in the blanks.
Pro tip: We all have that friend who is too nice for their own good. Don’t ask them because they won’t want to hurt your feelings. Ask someone who will be critical.
The planning stage is finished…
…Now what? It’s finally time to bring your online course to life and start production. This is something you can be thrifty with, but it’s also something that can end up being very pricey if you decide to outsource or hire a production team.
Personally, I’m all for penny pinching while still focusing on quality. Believe it or not, you can actually set up your own home studio without breaking the budget.
Planning your course content creates a solid foundation for your entire course business, and here is the fool–proof guide walking you through how to do it.
Once you’ve figured out your studio, the planning stage is officially finished. Now it’s time to execute your creation and then your launch. If you want to start thinking about your launch, we’ve got plenty of resources here on the Teachable blog.
Tags:
More like this


Your weekly dose of creative chat and Teachable updates. Get our weekly newsletter.