
If you’ve ever visited Amazon.com, you’re probably familiar with these phrases:
“Frequently Bought Together”
“Customers Who Bought This Item Also Bought”
These are upsells, attempts to entice a customer to make another, usually related, purchase in order to increase revenue per transaction.
There’s a powerful reason why the largest and most successful online retailer in the world includes these upsells in its website:
For online businesses, upselling can dramatically increase the revenue generated per sale.
In fact, Amazon has reported that 35% of its revenue is generated from product upselling.
In this post, I’ll show you EXACTLY how you can create a wide range of products to upsell from your Teachable school.
But first, it’s important to describe the kinds of products you can upsell and how you can use them in your online business.
Courses, webinar replays, exclusive content (ebooks, worksheets)
You can promote courses, webinar replays, or other exclusive content that is related or complementary to your main offering with your upselling product. These complementary promotions are great because once they have been created, no extra work is required on your part.
Unlike offering audits or hosting a private community, you can create the extra offering, set up a sales page, and more or less forget about it, while generating passive income.
One-on-one consulting calls, exclusive feedback sessions
When teaching a topic in which your students will actively work on specific projects (i.e. something like web design or programming), you can sell consultations or one-on-one calls that allow you to provide feedback on your students’ projects.
These are great ways to forge a stronger connection with your audience and build trust. On the downside, fulfillment of these types of offerings require a lot of your time, so think about using premium pricing if you plan to upsell direct access to yourself.
Private communities
Private communities are incredibly high in value, but require a lot of upkeep. For customers buying your online course, promoting a private community is a great tactic for a hands-on business owner who can dedicate a lot of time (or money to hire a manager for the community) to running and maintaining an online community.
These online communities are a great way for you to establish yourself as THE go-to expert in your niche. If your audience members are constantly turning to you and your group to answer their questions, you’ll be able to establish trust and long-term loyalty.
Live Q&As, webinars, and group coaching calls
Like consultation calls, these live Q&A’s and group coaching calls are a great way to forge a stronger relationship with your audience, but these methods are less time-consuming than one-on-one consulting sessions as you can work with a dozen people in the time you’d otherwise spend working with one person.
Here’s how to set up upsells for all or any of those products using Teachable:
Adding an upsell
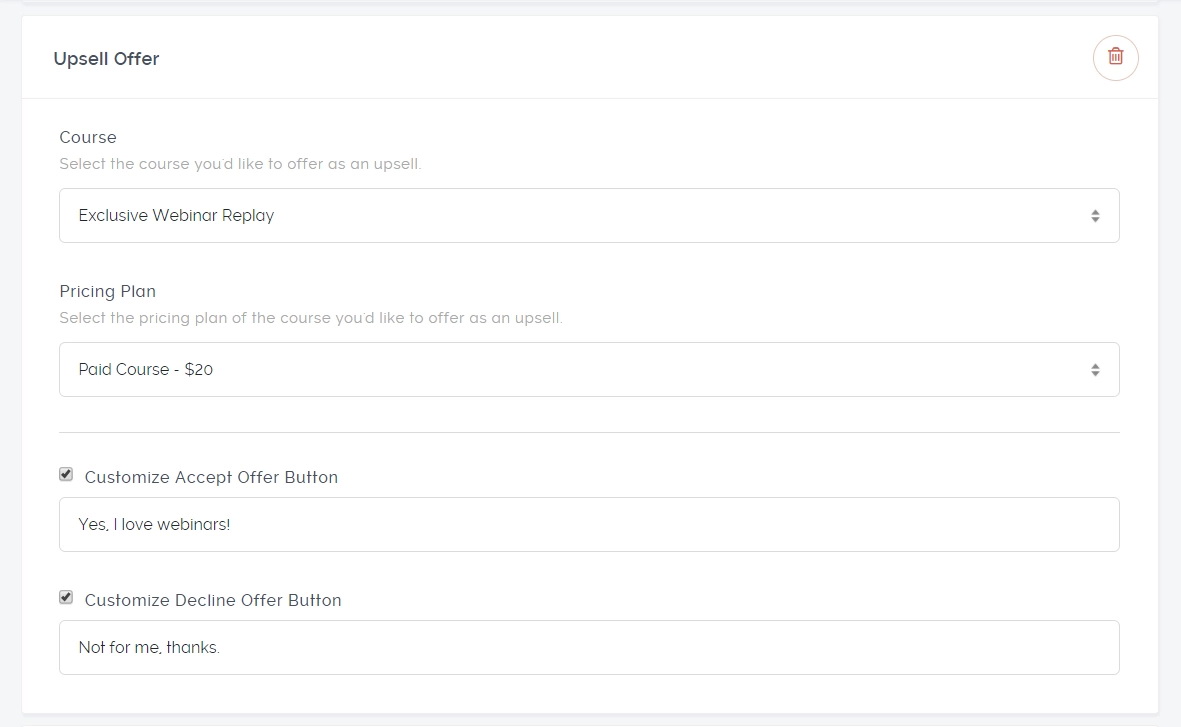
On Teachable, you can add an upsell offer directly to your thank-you page (e.g. the page that students see immediately after enrolling in a course). Our thank-you page editor, which you can find on the bottom sidebar of each course, shows two blocks specifically designed for upselling products.

- Video Embed block: upload a video with your upsell pitch (plus a heading and description).
- Upsell Offer block: choose the course and pricing plan you want to upsell, and customize your accept/decline buttons.
To learn more about using the thank-you page editor for upselling, continue to the Knowledge Base.
Now I will show you how to use this feature to upsell more than just regular courses!
Upselling a course, webinar replay, or exclusive content (e.g. eBooks, workbooks)
This process is straightforward, since each item can be hosted within a Teachable course. Simply create a new course, add content, use a descriptive title, and upsell it like any other course.
Upselling one-on-one consulting calls and exclusive feedback sessions
When you upsell your time or a service (often a call or feedback session), you can allow automatic signups as well as receive and track preliminary information about your students automatically (email addresses, websites, Skype names, questions). For this, we’ll also be using two free services: Google Forms and Calendly.
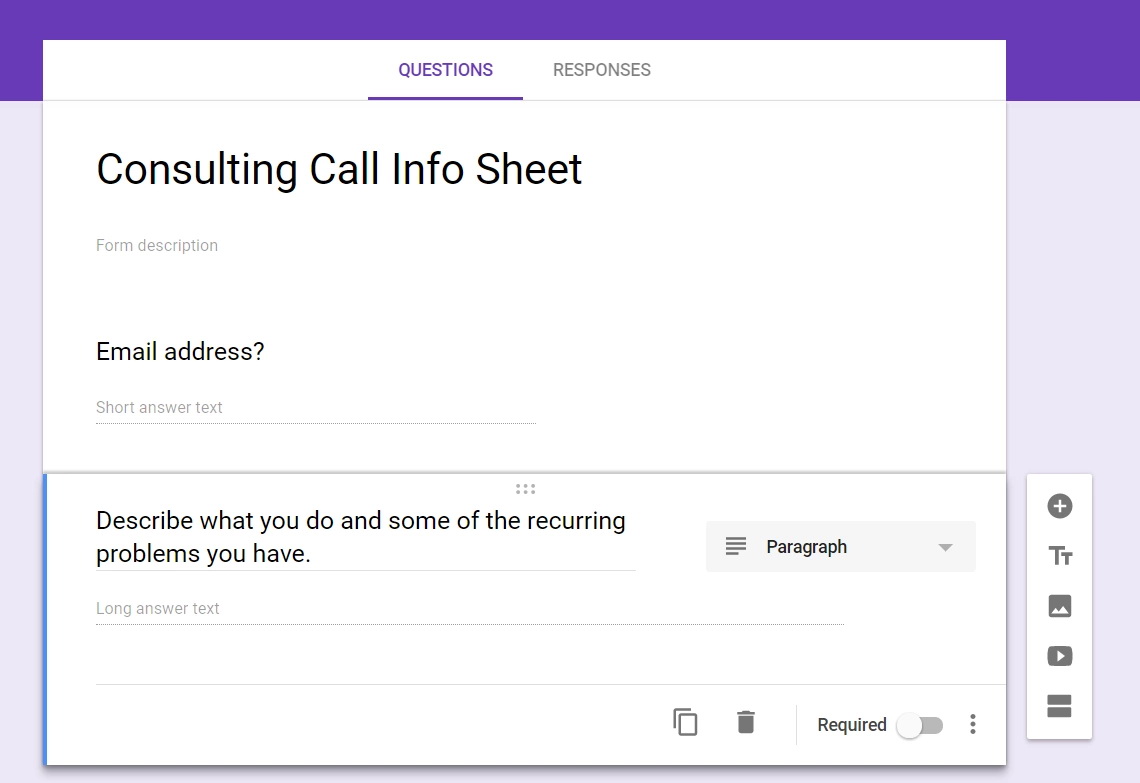
1. Create a Google Form with the questions people will need to answer before arranging their appointment. Toggle the email question and any other important matters to “Required.” (We’ll need their email for this process to work.)
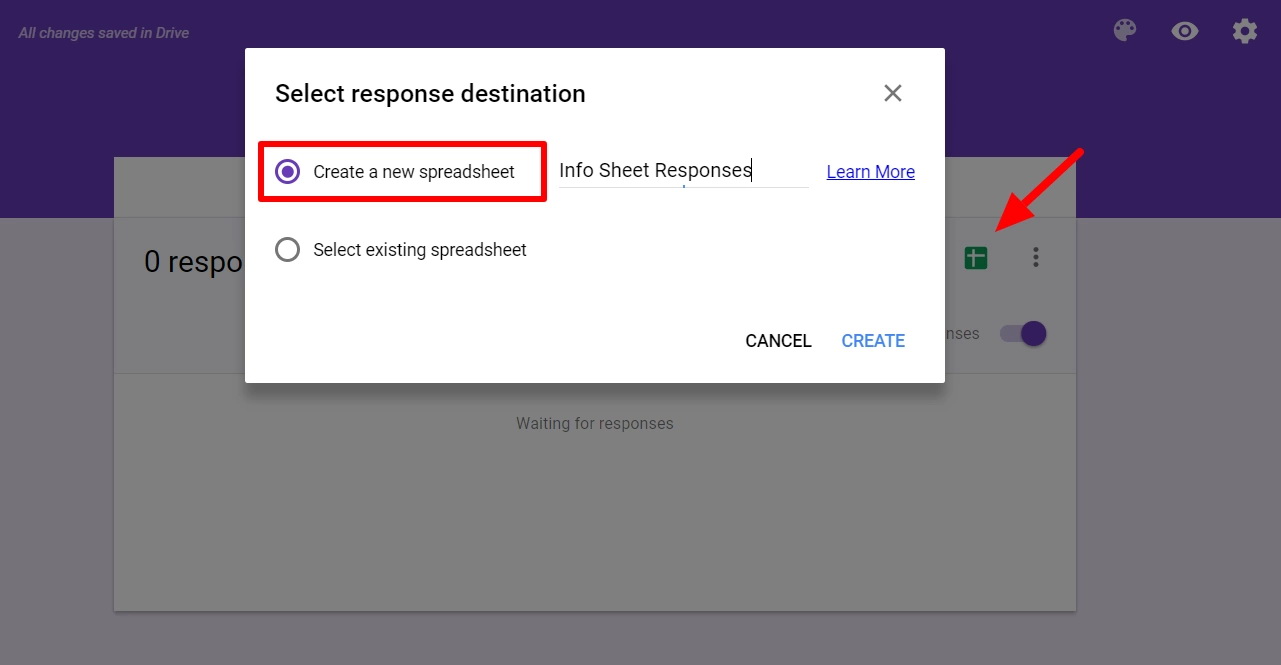
All form responses should be recorded in a spreadsheet by switching to the Responses tab, clicking the Google Sheets icon, and creating a new spreadsheet with your chosen name.
Test it by submitting answers to the form yourself.
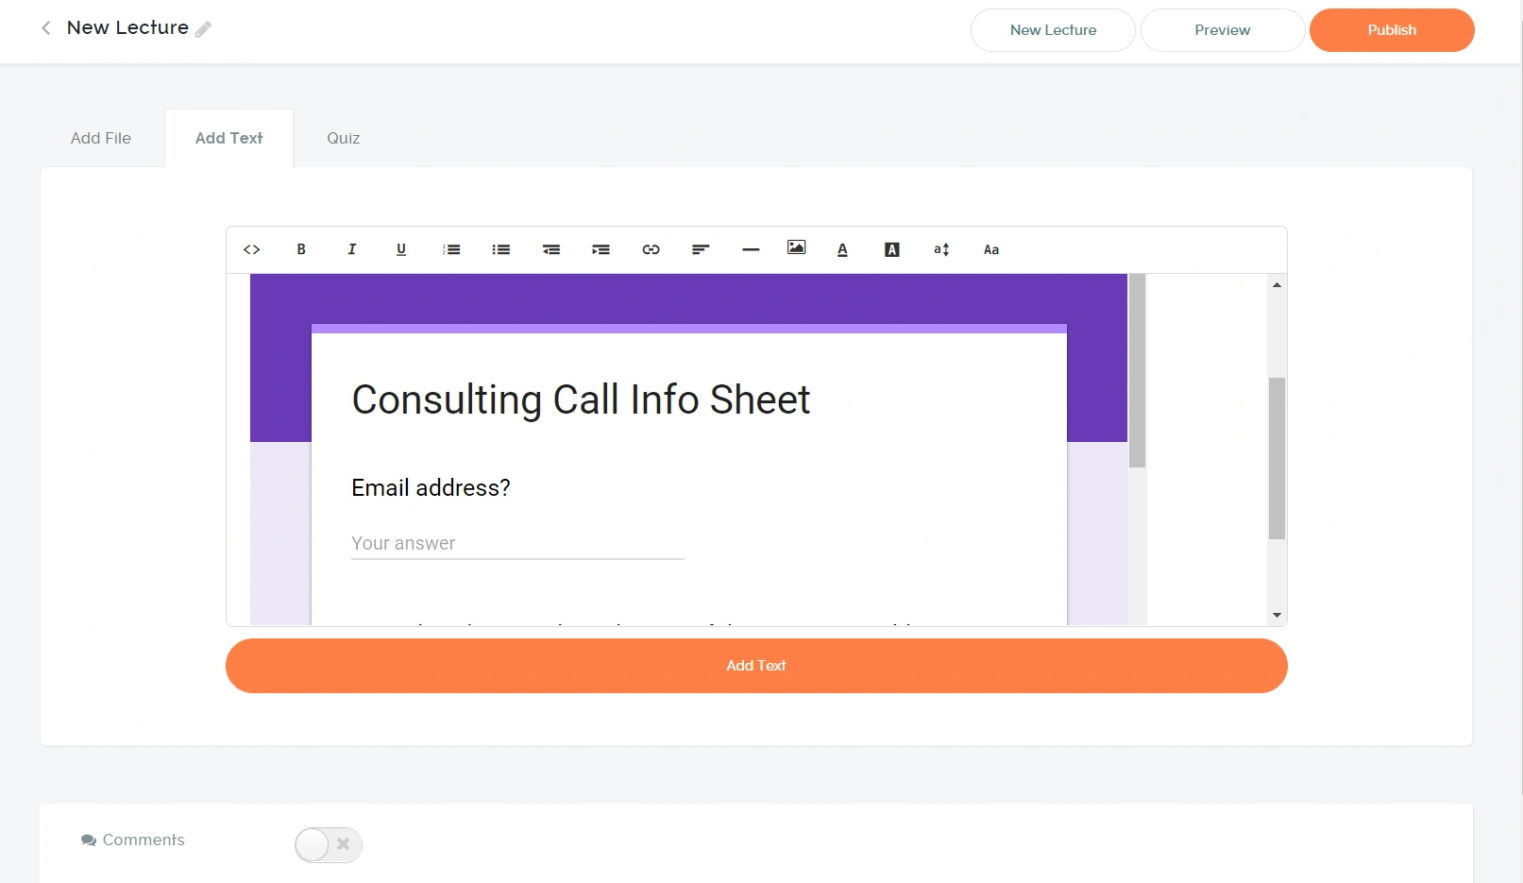
2. Create a new course—with a name describing the offer, like Consulting Call Bonus or Website Critique Bonus—and add one lesson. In this lesson, embed the Google form you just created.
Save and publish the lesson, or even publish the course if you want. If you’d rather not make it available to everyone on your school, you can leave the course unpublished—it won’t affect your upselling ability.
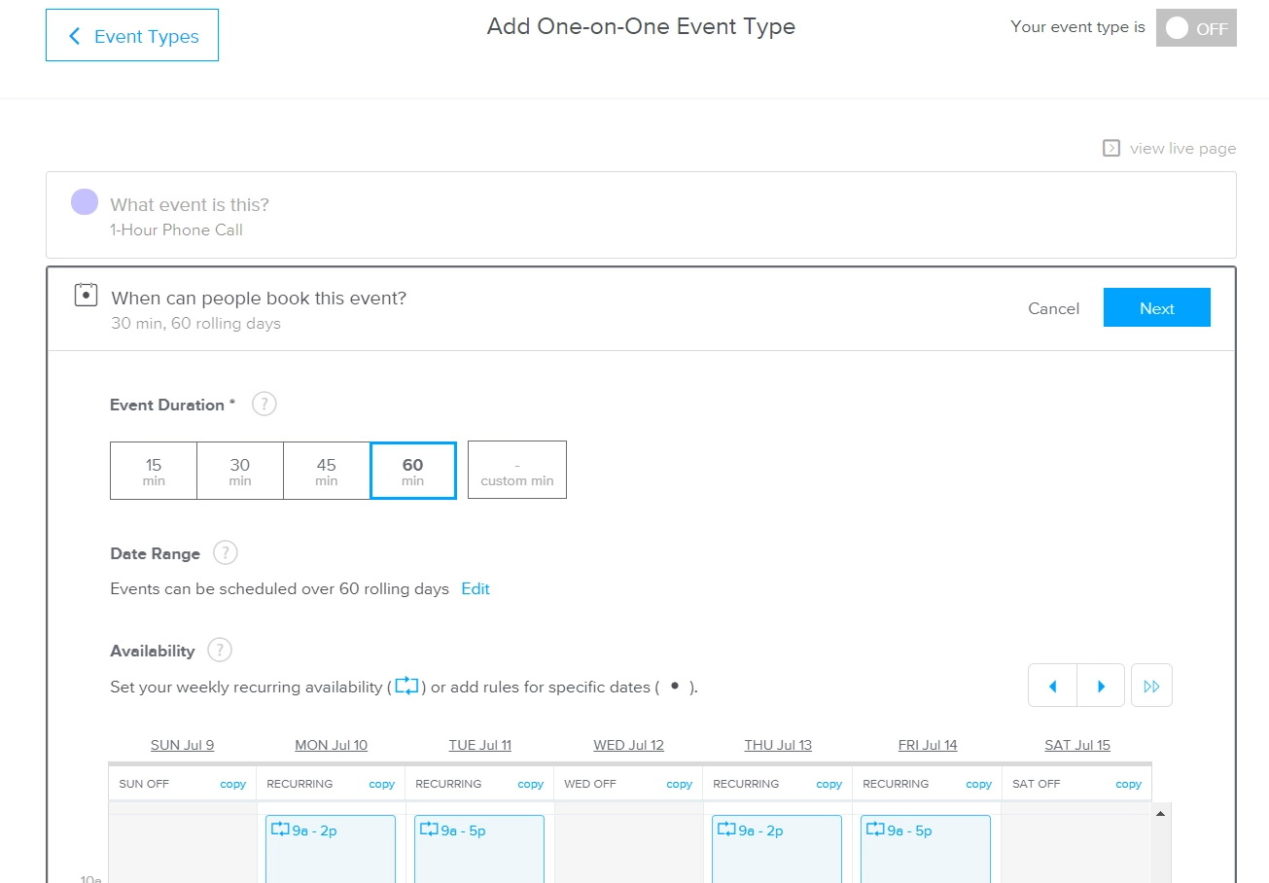
3. Now, set up a free Calendly account, and select the blocks of time when clients can set up meetings.
4. Organize the process so that once people fill out the form embedded in your lesson, they’ll be automatically sent a link to your Calendly. This can be accomplished with Zapier. Log in or sign up, and click Make a Zap!
Trigger app: Google Forms
Trigger: New Response in Spreadsheet
By connecting your Google account, you’ll be able to select the spreadsheet you created in step 1 above.
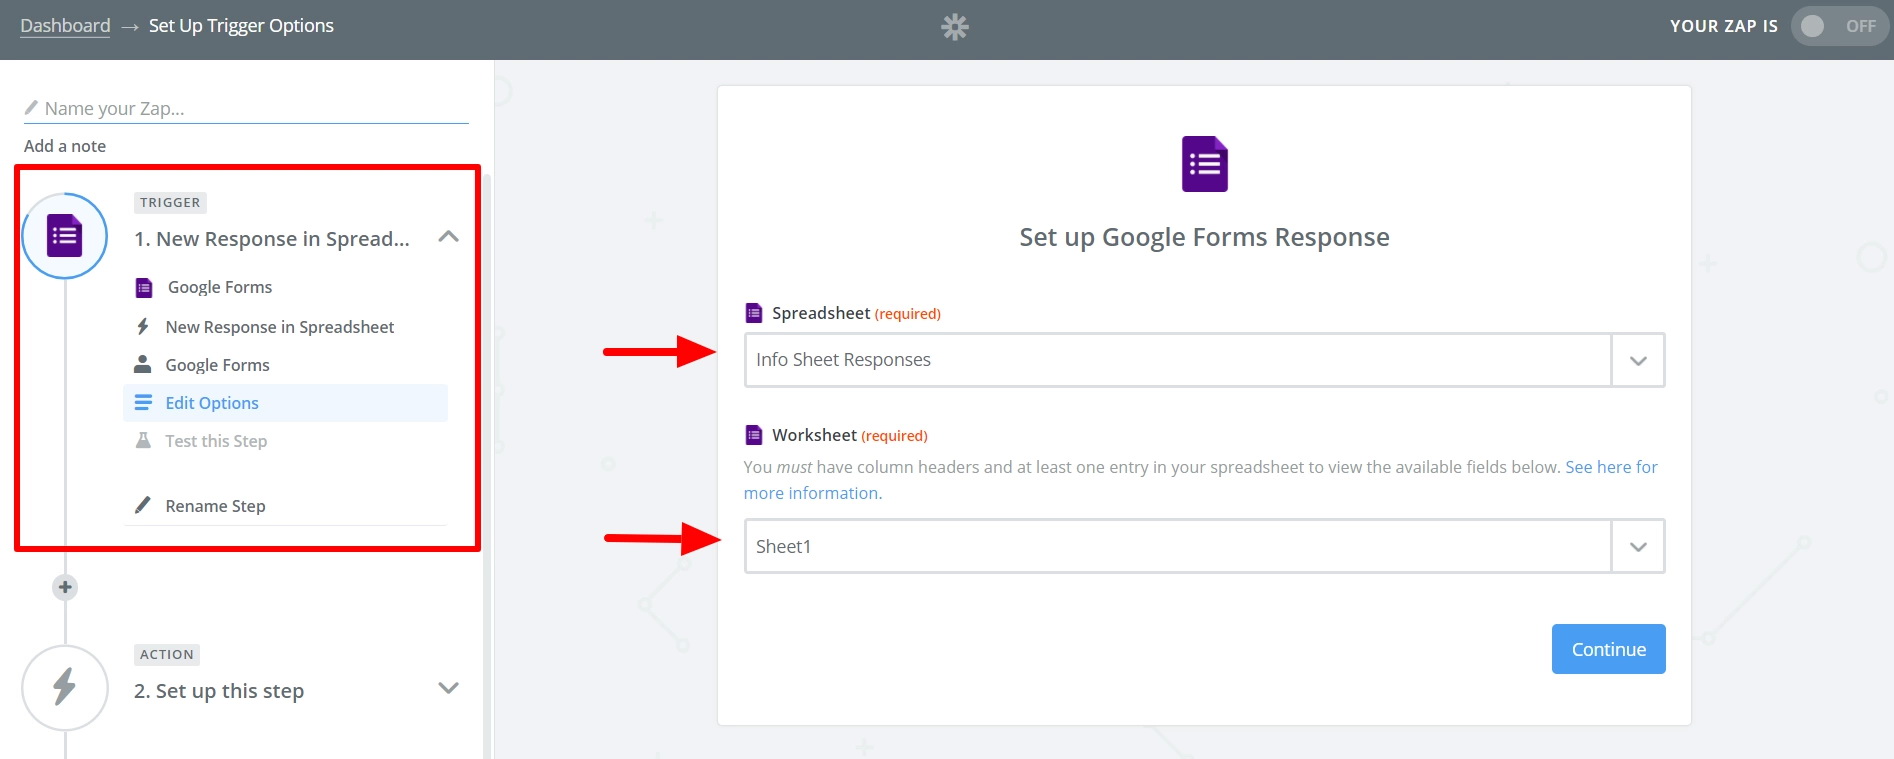
Test and save the trigger.
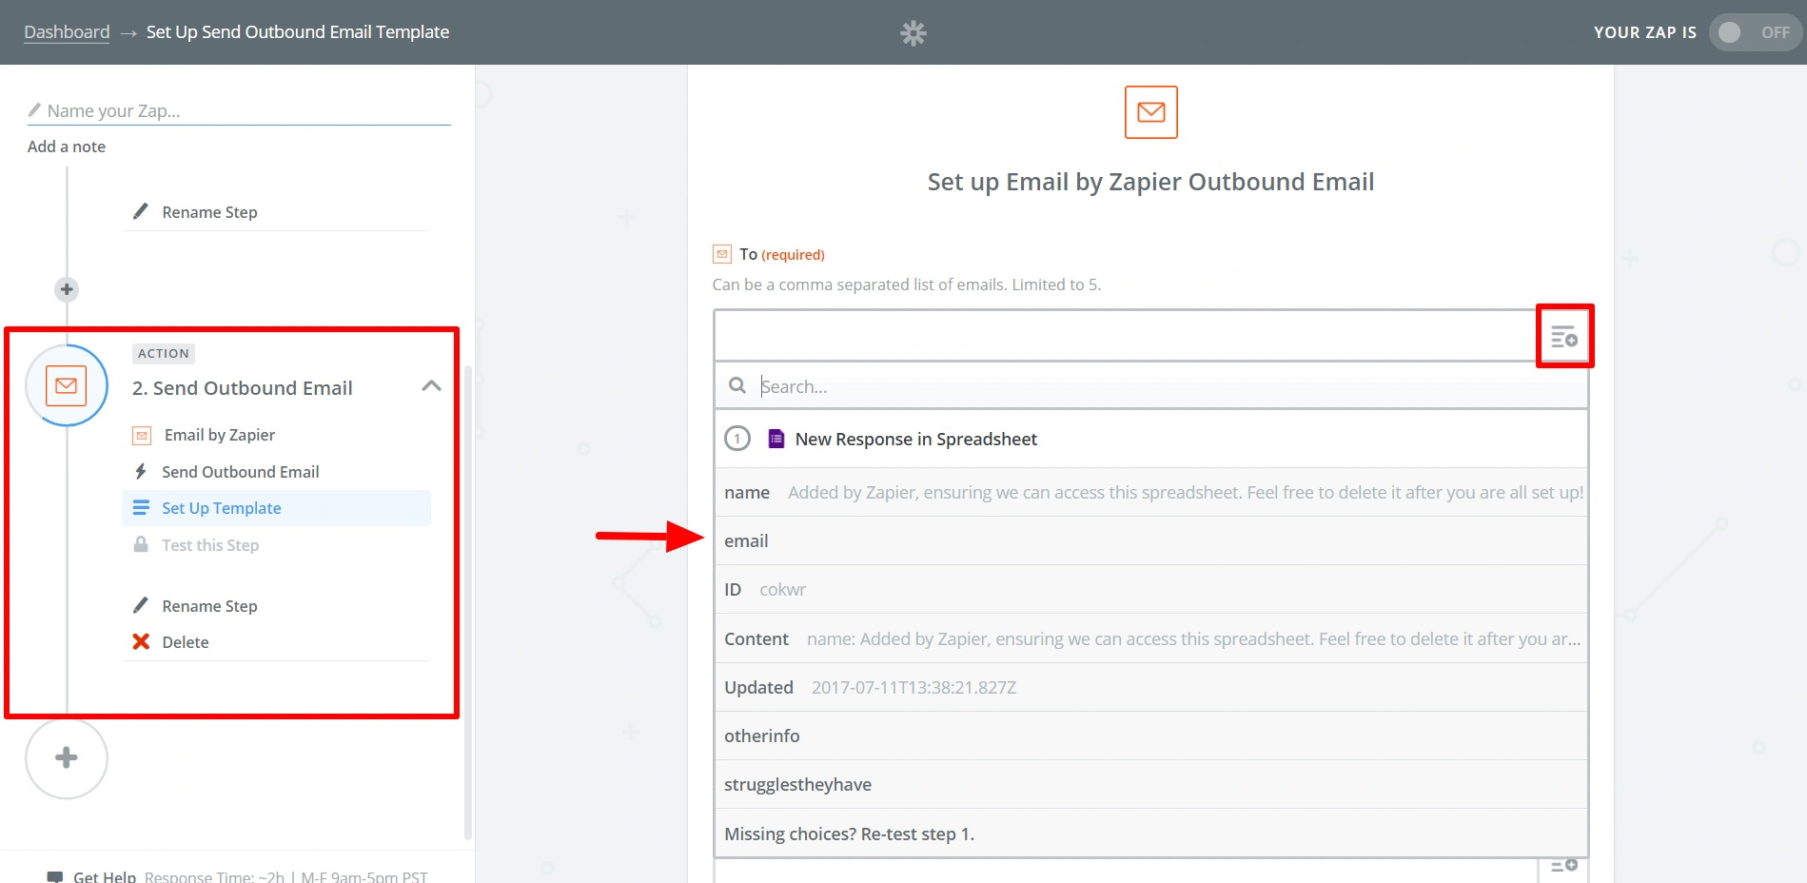
The action step, through the use of your Calendly link, will allow you to automate the process of sending an email to anyone who submitted form responses.
Action app: Email by Zapier
Action: Send Outbound Email
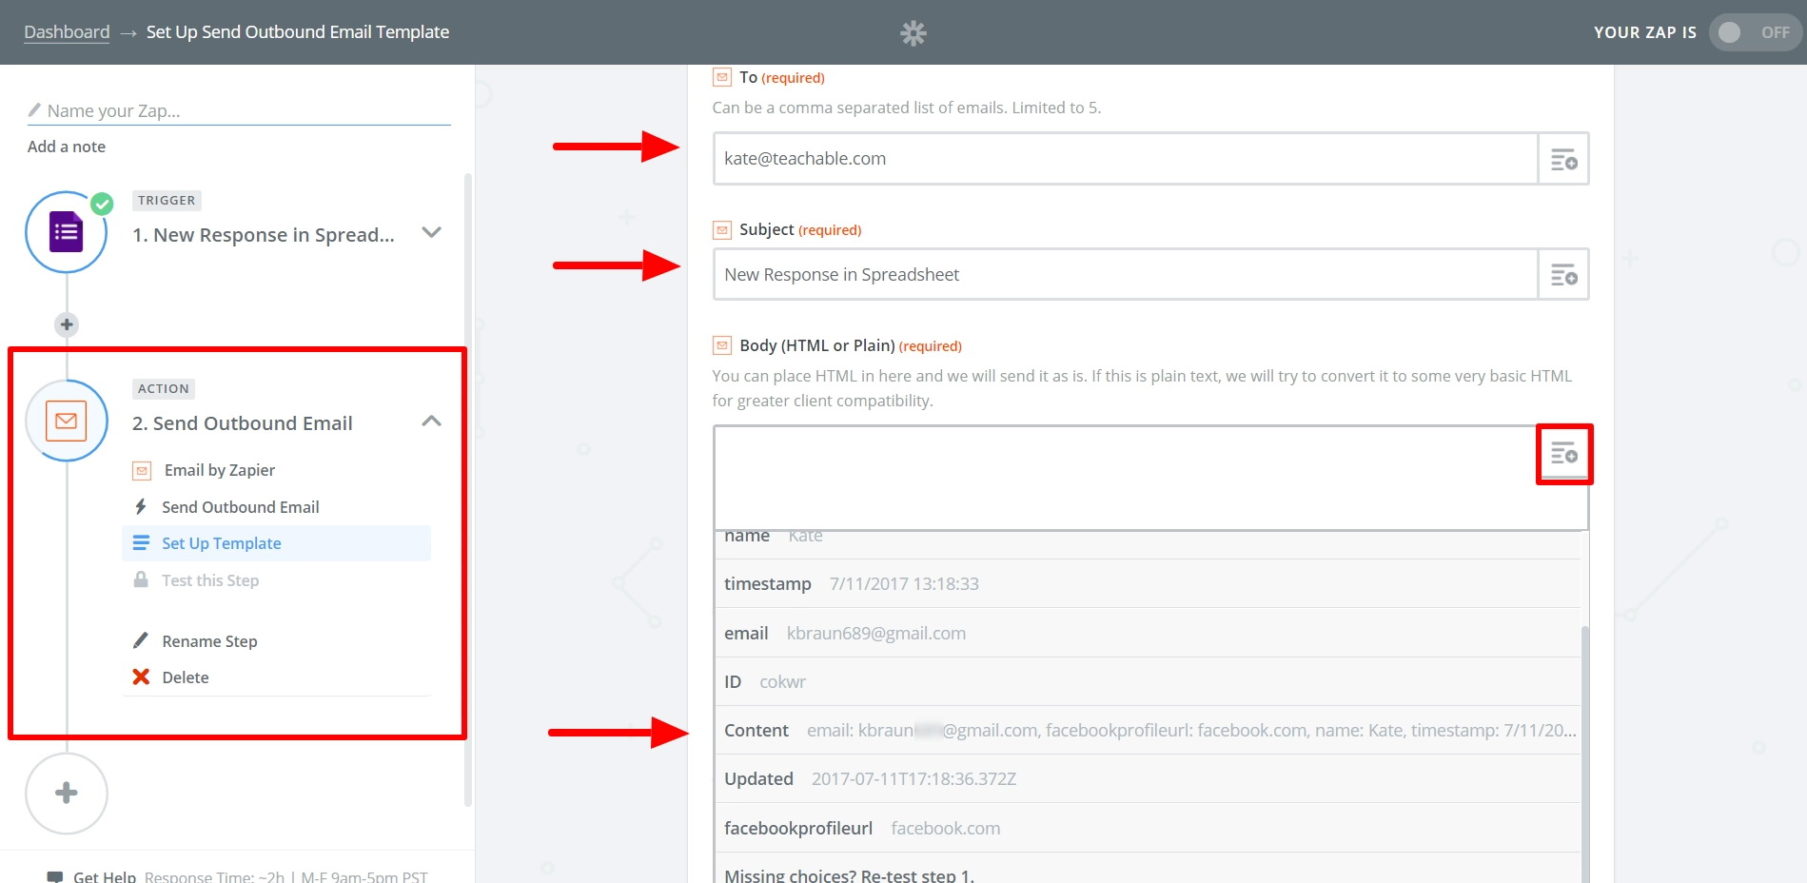
When you reach the Template step, use the button on the right to find your spreadsheet from step 1, and choose Email (or whatever you named your email question in the form) as the “To” field.
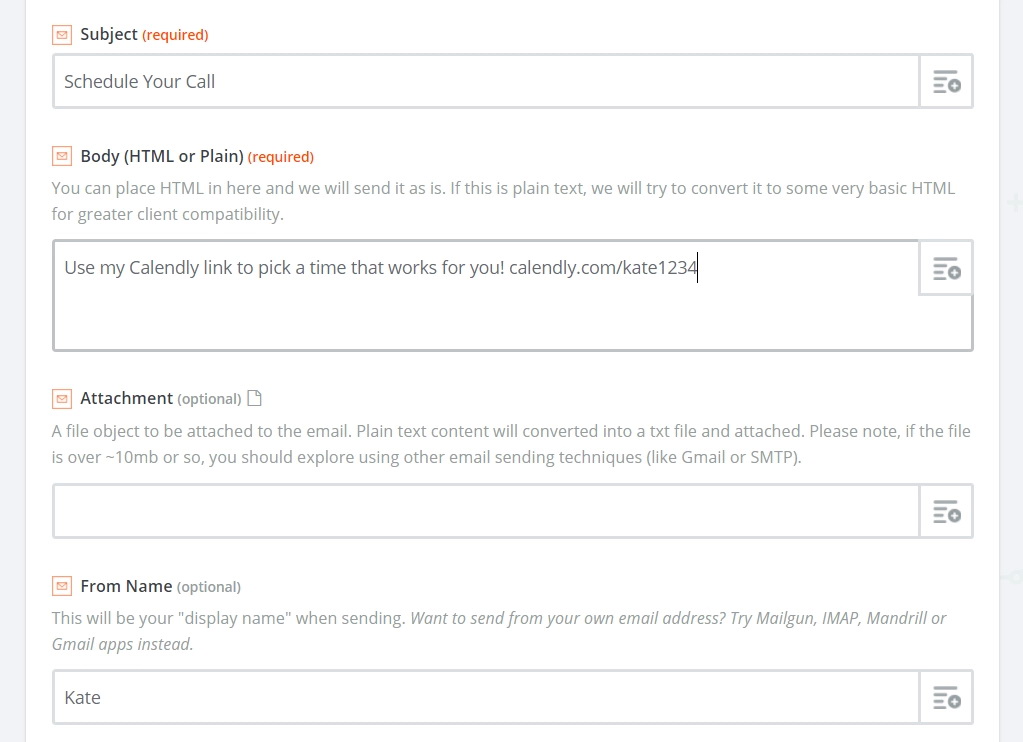
Finish customizing the template by giving your email a subject, body, and name. In the body, make sure to include the link to your Calendly page.
Test your Zap and turn it on. Now, everyone who fills out the form should receive an email to arrange a time to work with you.
5. Finally, add the course created in step 2 as an upsell to your original course. Find directions here.
Upselling access to a private community
There are two ways to upsell access to a private community. Use the first method if you want to create the community within Teachable; use the second if you want to create a community outside Teachable (e.g. a closed Facebook group).
Method 1 – Community Within Teachable
This method utilizes lessons and comments to create a forum-like discussion course, which you can then add as an upsell.
1. Create a new course, titled something like “[Main Course] Discussion Community.”
2. Add lessons and title each of them with various discussion topics/prompts (or however you want to set it up). For example, an art school might dedicate a thread for students to submit their pieces and get feedback. In each lesson, write a description of rules for that comment thread, and simply enable comments for each of the lessons. The final product should look like this:
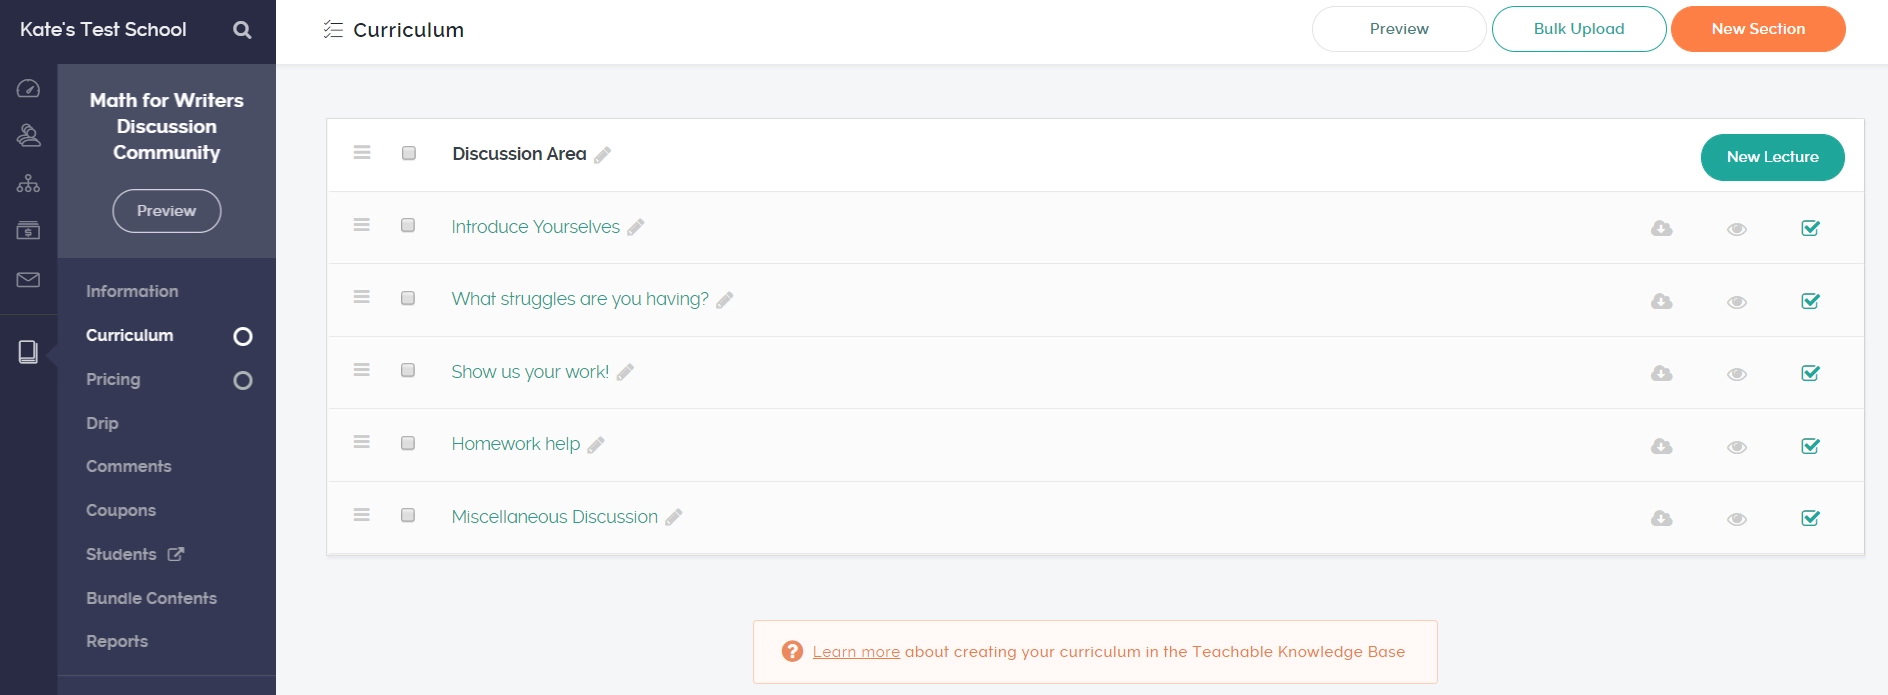
3. Publish the lessons. Again, it’s your decision whether or not to publish the course—you can still upsell an unpublished course without it being public to everyone in your school.
4. Add the discussion course as an upselling item linked to your main course. For more thorough directions on this, head to our Knowledge Base.
Method 2 – Community Outside Teachable
For a community outside Teachable, create an automation that will notify you about when to add a new student to your group (like a private Slack or Facebook group).
1. First, create a Google Form for students to submit the information you’ll need (e.g. name, email, Slack username, Facebook profile URL).
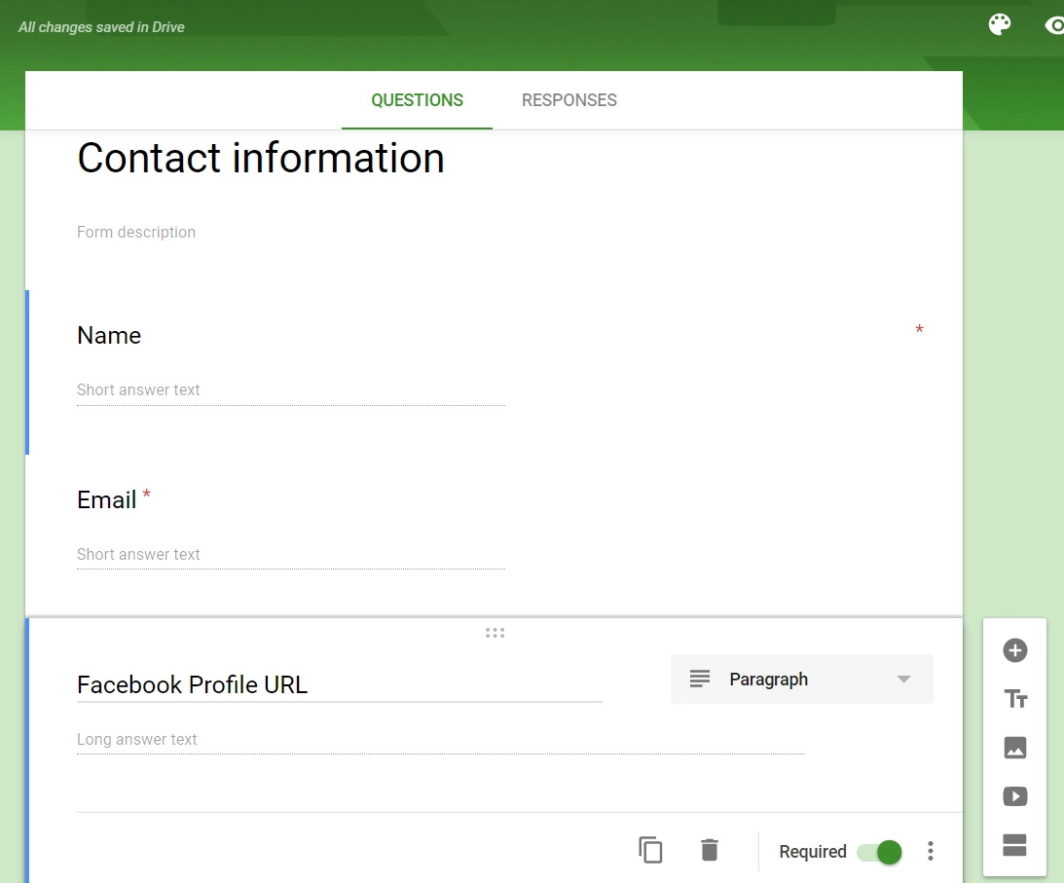
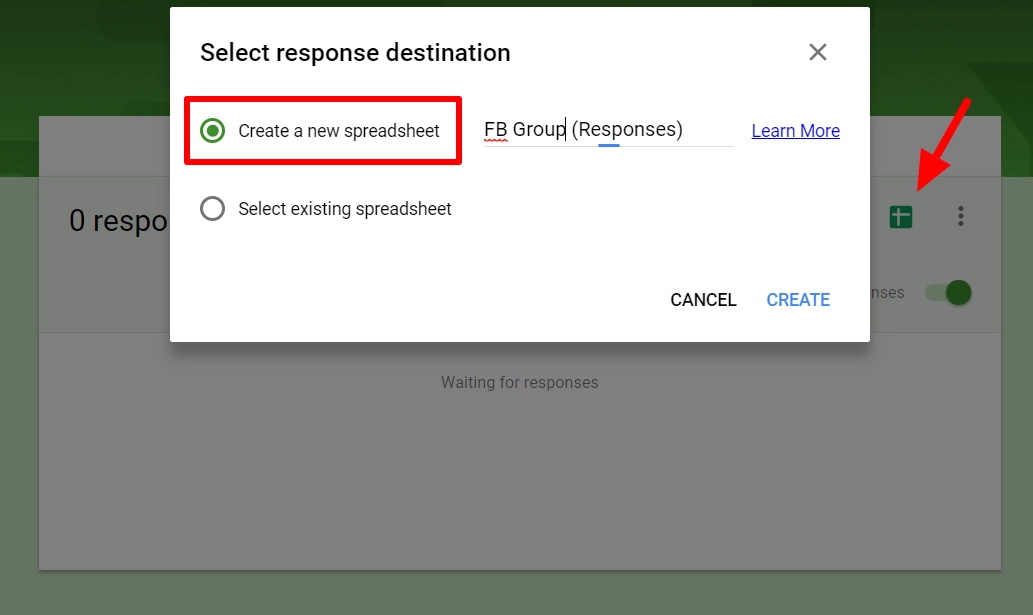
Record responses in a spreadsheet by moving to the Responses tab, clicking the Google Sheets icon, and setting up a sheet. (Test it by submitting answers to the form yourself.)
2. Create a course (named something like “Private Community Access”), add a single lesson, and embed your Google Form inside the course.
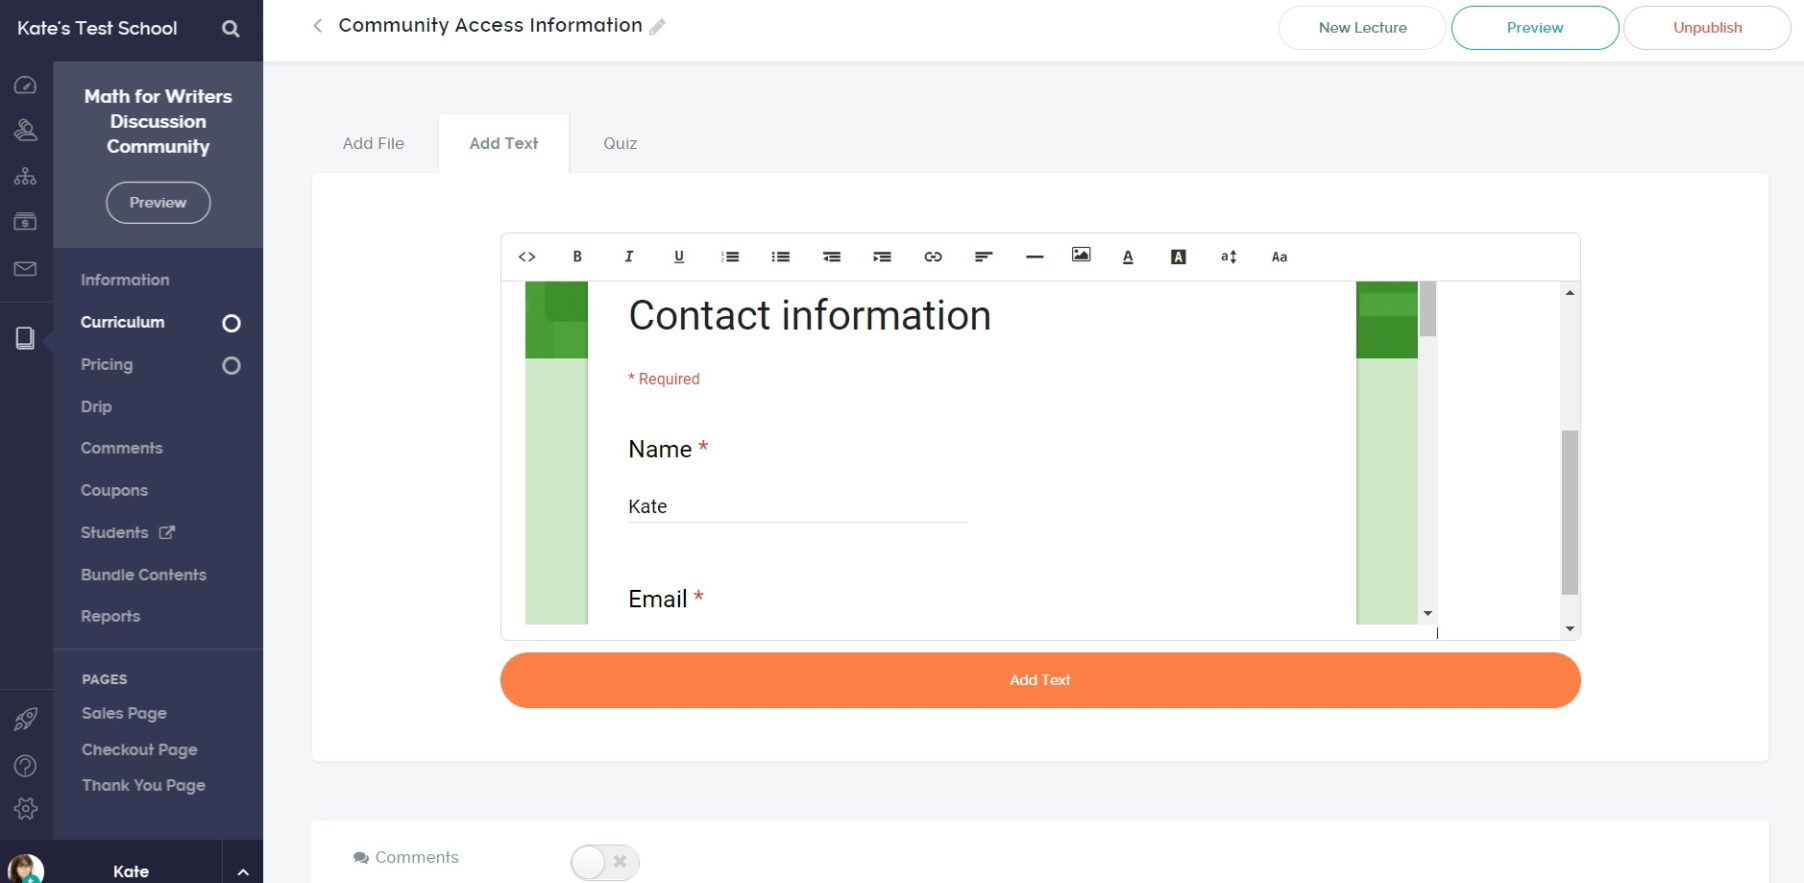
Publish the lesson. You can leave the course unpublished if you don’t want it to appear in your school directory; it won’t affect your ability to later add it as an upselling product.
3. Now use Zapier to send an email containing all the information students submitted in this form. Log in or sign up to Zapier, and click Make a Zap!
Trigger app: Google Forms
Trigger: New Response in Spreadsheet
Connect your Google account, then move to the set-up step. Select the spreadsheet in which form responses are recorded:

Test and continue to the Action step.
Action app: Email by Zapier
Action: Send Outbound Email
At the Template step, type your own email (or your virtual assistant’s email) into the “To” field and a subject that will help you remember the subject line. Using the button on the right, choose the Content from step 1 as the email body:
Finish the Zap and turn it on. Now, you’ll conveniently receive an email with all of the student’s information when they submit a response to the form, and can easily add them to your group.
4. Finally, add the course created in step 2 as an upselling enhancement to your main course. For more detailed instructions, see the Knowledge Base.
Upselling live sessions and group coaching calls
The process for upselling live sessions is very similar to the process of creating a regular video course. The difference is that you will embed a live stream into a lesson (e.g platforms such as YouTube Live, LiveStream, Ustream, etc).
1. Create a course; use the first lesson to write a description of the live session and the date when it will happen. This way, any new students enrolled in this course will get that information immediately.

2. Embed your live stream inside an offline lesson. Check out our Knowledge Base to learn more. This will prevent students from seeing an empty lesson if the live session has not yet begun.
3. Use your email service provider or Teachable’s built-in email feature to send reminders to students enrolled in this course. (Note: it’s common practice to stage these reminders at 1 day, 4 hours, 1 hour, and 5 minutes prior to the start of the live session.)
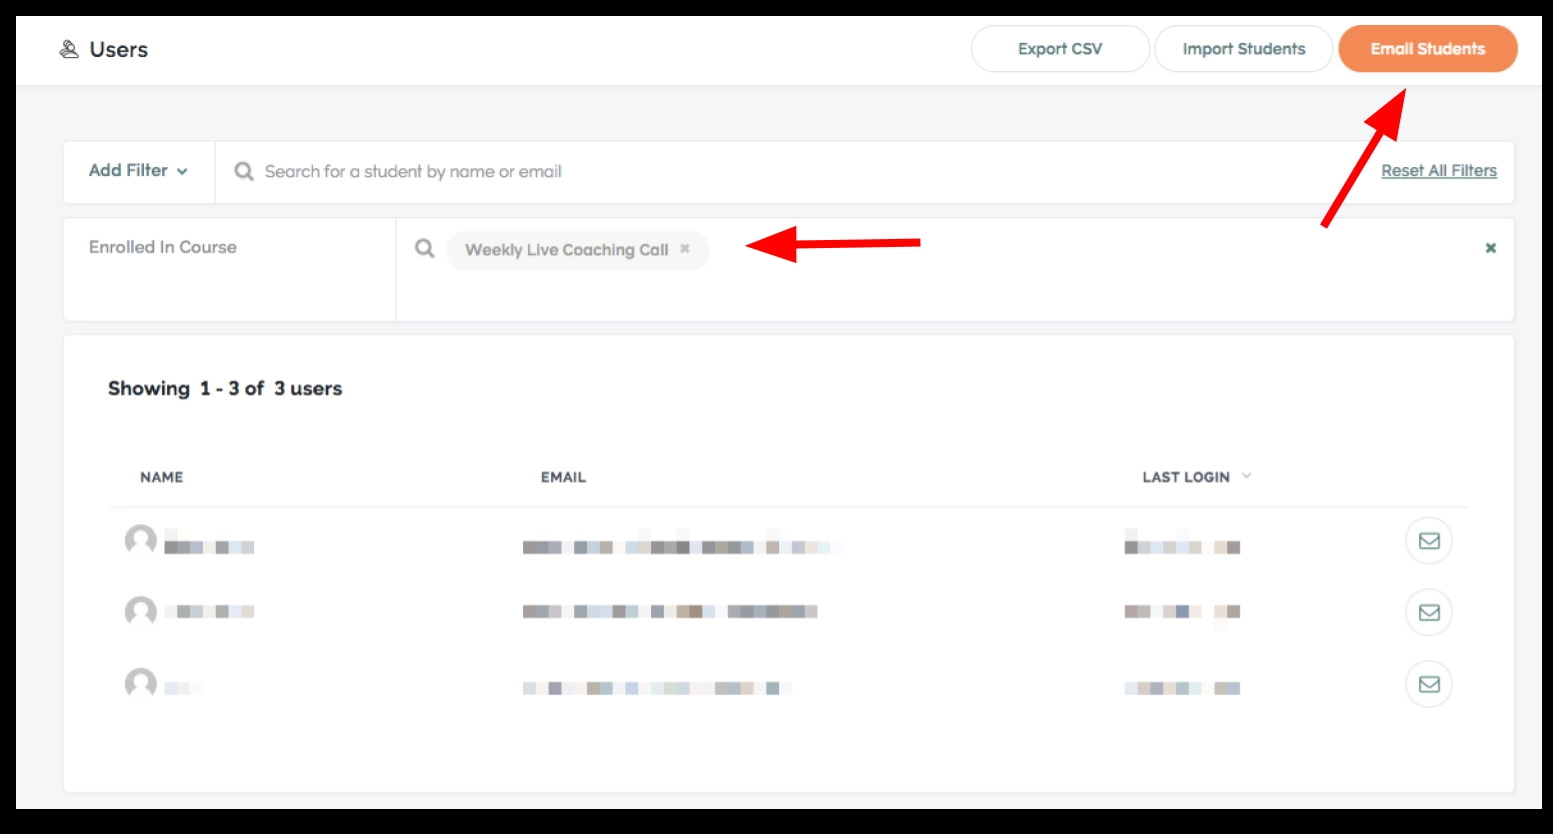
If you choose to use Teachable, just go to your Admin dashboard and click on ‘users’. Once there, you can filter users who are enrolled in this course and email this specific segment.
4. Once the time is up for the live streaming, you can publish the lecture containing the embedded live stream and conduct your live session.
5. After the session ends, unpublish the lesson and update the date of the next live session in the first lesson of the course.
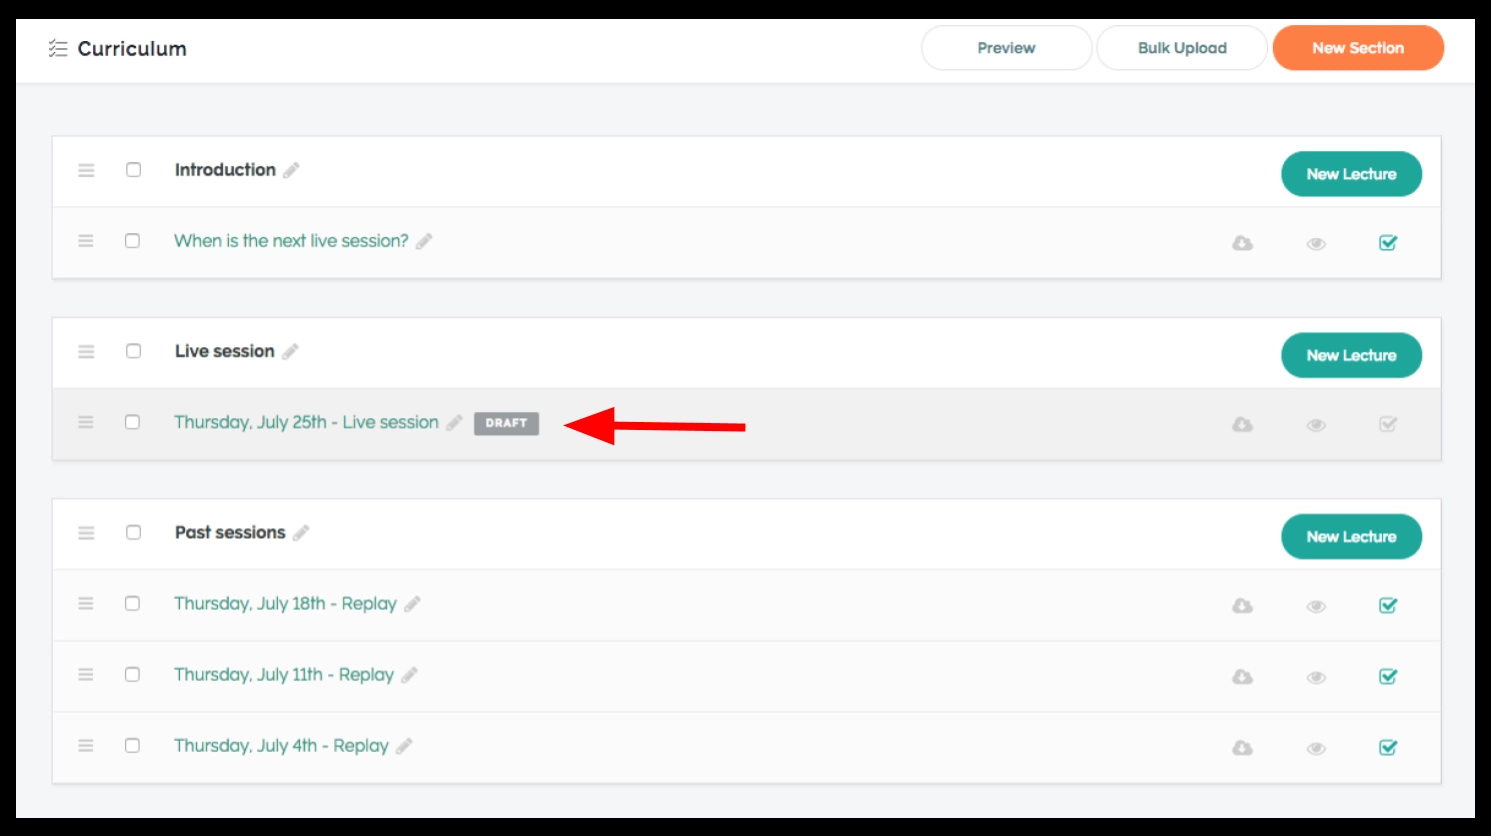
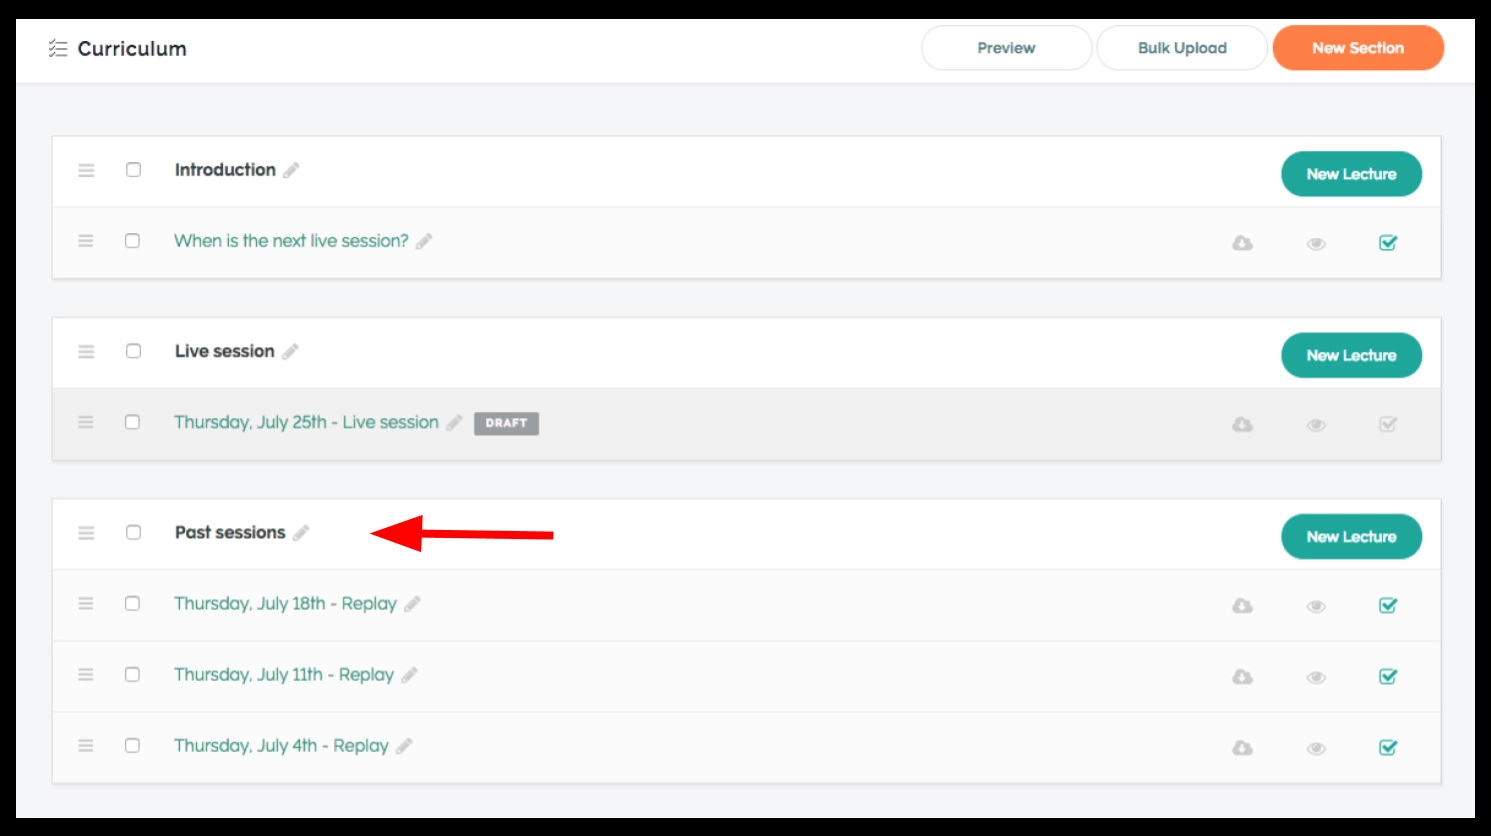
6. (Optional step) If you wish to keep an archive of your live sessions at a place where your students can view replays, just create a new section within your course called “Previous sessions”. Add any new recordings of your sessions to a new lesson within that section.
Now you know how to upsell (almost) anything using our new post-purchase upselling feature.
How to take this further
These are a few pointers to make your upsells even more compelling:
- Add a coupon to your upselling offer: make it even more irresistible.
- Include a video about your upselling course on the thank-you page, using our new video block to increase engagement and conversion rates.
Tags:
More like this


Your weekly dose of creative chat and Teachable updates. Get our weekly newsletter.